
If your oven isn’t heating properly — or worse, burning your food — it might not be your cooking skills at fault. A broken oven thermostat could be the real culprit. Whether you’re a weekend baker or a full-time meal prepper, your oven’s thermostat plays a critical role in regulating temperature and keeping your dishes cooked to perfection.
In this guide, we’ll walk you through what an oven thermostat does, how to spot the signs it’s malfunctioning, how to fix it, and when it’s time to bring in the pros.
What is an Oven Thermostat?
An oven thermostat is a temperature-sensitive switch that controls the heat inside your oven. It monitors the oven’s internal temperature and signals the heating element to turn on or off to maintain the set temperature. When the thermostat is working correctly, your oven heats evenly and maintains a consistent temperature.
But when it’s faulty, you may experience undercooked meals, scorched dishes, or an oven that doesn’t heat up at all.
Signs of a Faulty Oven Thermostat
How do you know if your thermostat is to blame? Here are a few telltale signs:
Inconsistent temperatures: Your oven doesn’t maintain the temperature you set.
Burnt or undercooked food: Even when you follow a recipe exactly, your food doesn’t come out right.
Longer preheating times: The oven takes unusually long to preheat.
Oven not heating at all: The oven turns on, but the interior remains cold.
Temperature doesn’t change when adjusted: You change the temperature setting, but nothing happens.
If you notice one or more of these issues, it’s time to inspect your thermostat.
Step-by-Step Guide to Fixing a Faulty Oven Thermostat
Before diving in, unplug your oven or turn off the circuit breaker to avoid any electrical hazards.
Step 1: Confirm the Problem
Use an oven thermometer to test the internal temperature. Preheat the oven to a specific temperature and check if the internal reading matches the setting. If it’s way off, your thermostat is likely faulty.
Step 2: Locate the Thermostat
In most ovens, the thermostat is found at the back of the oven or behind the control panel.
Step 3: Remove the Faulty Thermostat
Unscrew or unclip the thermostat from its mounting. Carefully disconnect any wires (take a photo beforehand so you remember how to reconnect them).
Step 4: Install the New Thermostat
Attach the wires to the new thermostat and secure it in place. Make sure it’s properly mounted and aligned.
Step 5: Reconnect Power and Test
Plug your oven back in and test it by preheating to a set temperature. Use your oven thermometer again to check accuracy.
Additional Tips for Oven Thermostat Maintenance
To extend the life of your thermostat and keep your oven working efficiently:
Clean your oven regularly: Buildup of grease or food can affect thermostat performance.
Avoid slamming the oven door: This can dislodge or damage internal parts, including the thermostat.
Monitor oven performance: If you notice uneven heating, don’t ignore it — test it right away.
🔧 Need a professional repair?
GIR Appliance Repair serves Houston, The Woodlands & Kingwood — same-day availability.
Use quality replacement parts: Don’t cut corners with cheap replacements that can fail faster.
Types of Oven Thermostats: Mechanical vs. Electronic
Not all oven thermostats work the same way — and knowing which type your oven uses changes how you diagnose and repair it. If you’re getting quotes or trying to troubleshoot before calling a tech, understanding these differences will save you time and money.
Mechanical / Bimetal Thermostats are found in older ovens — typically models made before the mid-1990s. Inside, a bimetal strip physically bends as it heats up, opening or closing an electrical circuit to cut heat on and off. These parts are inexpensive ($15–$40 in most cases) and straightforward to replace. The telltale failure pattern is a consistent temperature offset: your oven runs 25°F or more too hot or too cold every single time, and it never varies. That consistency is actually a clue — the strip has drifted out of spec but is still functioning in a predictable (just wrong) way.
Electronic Temperature Sensors (RTDs) are the standard in virtually every oven built after 2000. A small probe mounted inside the oven cavity measures resistance, and the control board converts that resistance reading into a temperature. When the sensor fails, you’ll often see an error code displayed — common ones include F3, E1, or OE depending on your brand. Other signs: wildly swinging temperatures with no pattern, an oven that simply won’t start, or a digital display that shows an implausible temperature like 900°F at startup.
Control Board Failures are easy to confuse with thermostat or sensor failures. If the sensor reads correctly but the control board misinterprets the data, you’ll see the same symptoms — erratic temperatures, error codes, or no heat. Replacing a $30 sensor when the board is the real problem is a costly mistake. This is one of the biggest reasons proper diagnosis matters before ordering parts. Our oven and cooktop repair service always starts with a full diagnostic so you’re never paying for parts you don’t need.
Thermostat Calibration vs. Replacement
Here’s something most homeowners don’t know: your oven may not need a new thermostat at all. Many ovens — gas and electric — have a built-in calibration feature that lets you offset the thermostat reading up or down to compensate for drift. If your oven consistently runs 20°F too cool, calibration might be the free five-minute fix you’ve been missing.
How to access calibration mode: On most models, press and hold the Bake button for 5 seconds until the current offset appears on the display (it typically shows “0” or “CAL 0”). Use the up/down arrow buttons to adjust in increments — most ovens allow a range of +/- 35°F. Press Start or Bake again to save. Consult your owner’s manual for model-specific steps, as the process varies by brand (GE, Whirlpool, Samsung, LG, and Bosch all differ slightly).
When calibration IS the right fix: If your oven runs consistently off by a predictable amount — say, 25°F low every single time — and the oven otherwise functions normally, calibration is the correct first step. It costs nothing and takes under a minute.
When calibration WON’T work: If the thermostat or sensor probe has completely failed — meaning there’s no continuity on the sensor, the oven won’t heat at all, or temperatures swing unpredictably — no amount of calibration will help. A physically damaged sensor probe or a burned-out thermostat needs to be replaced. In those cases, expect to pay $150–$300 for professional thermostat or sensor replacement, including parts and labor. That’s still far less than replacing the oven itself, which runs $800–$2,500 for most mid-range models.
Oven Thermostat Repair Cost — The Woodlands TX
Repair costs vary depending on your oven’s brand, age, and what’s actually failed. Here’s a realistic breakdown of what you can expect to pay for thermostat-related oven repairs in The Woodlands and greater Houston area. Note that the $55 GIR service call fee is applied toward any repair — so it’s not an extra charge on top.
| Service | Typical Cost | Notes |
|---|---|---|
| Oven calibration adjustment | $0 (DIY) | Built-in feature on most modern ovens; no parts needed |
| Temperature sensor (RTD) replacement | $120–$220 | Parts $20–$60; most common repair on post-2000 ovens |
| Mechanical thermostat replacement | $130–$250 | Parts $15–$40; older ovens; labor is the main cost |
| Control board diagnosis & repair | $200–$450 | Board replacement; diagnosis first to confirm root cause |
| Full oven repair diagnostic | $55 (applied to repair) | GIR service call fee; credited toward repair cost |
| Bake element replacement | $120–$275 | Often misdiagnosed as thermostat failure; confirm with multimeter |
Frequently Asked Questions
How do I know if my oven temperature is off without a thermometer?
The simplest test is baking something with a predictable result — a batch of cookies or a box cake at the recommended temperature and time. If they consistently burn before the timer goes off, your oven is running hot. If they’re still raw, it’s running cold. You can also notice how fast the oven preheats: most standard ovens reach 350°F in 10–15 minutes. Consistently faster or slower than that is a red flag worth investigating before you assume your thermostat is fine.
Can I use my oven if the thermostat is broken?
Technically yes, but it’s not recommended — especially for baking. A failing thermostat can cause your oven to overheat, which is a fire risk with fatty foods or items near the heating element. For broiling or simple reheating, a slightly off thermostat may be manageable short-term, but for anything that requires precise temperatures, you’re risking ruined meals and potentially a safety hazard. Get it inspected sooner rather than later, and use an oven thermometer in the meantime to monitor temperatures manually.
How long does an oven thermostat last?
Mechanical bimetal thermostats in older ovens typically last 10–15 years with normal use. Electronic temperature sensors in modern ovens have a similar lifespan, though they can fail earlier if the oven is used heavily, if there are power surges, or if the oven runs extremely hot for extended periods (such as during long self-clean cycles). The self-clean cycle — which runs at 800–900°F — is one of the most common causes of premature sensor failure. If your thermostat problems started right after a self-clean, that’s likely why.
Is it the thermostat or the heating element? How can I tell?
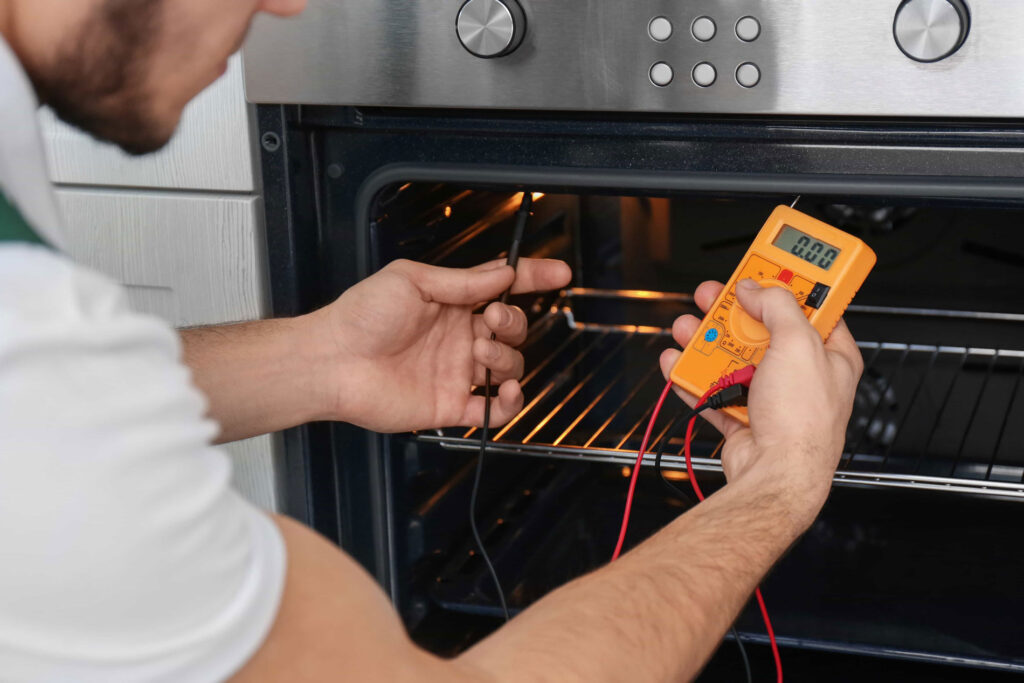
This is one of the most common diagnostic questions we get. A failing heating element usually shows visible damage — blistering, a hole, or a break in the element. If the element looks intact but the oven still won’t heat, the thermostat or sensor is more likely the culprit. You can test the element with a multimeter for continuity. If the element tests fine but temperatures are erratic, suspect the sensor or control board. If you’re unsure, check out our guide on oven taking too long to preheat — it covers both failure types in detail.
Does GIR Appliance repair oven thermostats in Spring TX and Conroe TX?
Yes — GIR Appliance serves The Woodlands, Spring, Conroe, Kingwood, and the surrounding Houston metro area. We offer same-day and next-day oven repair appointments across all these communities, and we work on all major brands including GE, Whirlpool, LG, Samsung, Bosch, Frigidaire, and more. Our $55 service call is applied to the repair, so there’s no separate diagnostic fee. If you’re having thermostat or heating issues, give us a call at (346) 625-4289. We’ve also seen our share of gas stove not sparking issues that turn out to be related ignition or control problems — we handle those too.
Your Trusted Oven Repair Partner in Woodlands and Houston
Diagnosing and fixing a broken oven thermostat isn’t always straightforward, but it can save you the cost of replacing the entire appliance. Whether you’re dealing with minor issues or more complex oven problems, GIR Appliance is here to help.
As one of the top-rated oven repair services in Woodlands and the Houston area, GIR Appliance is known for fast response times, experienced technicians, and honest pricing. If your oven’s acting up, don’t sweat it — just give GIR Appliance a call, and we’ll get you cooking again in no time!
Dealing with oven thermostat problems? Our technicians provide same-day oven repair in The Woodlands, Houston & Kingwood — all brands, upfront pricing, $55 service call applied to repair.
Ready to schedule your repair?
We serve The Woodlands, Kingwood, Spring, Humble & greater Houston. Call or book online.